historical Reporting
Users have the ability to enter data for a previous date as far back as seven days (not including today) through the Data Upload feature.
For the most accurate instructions, users uploading the latest unified template should see the Unified Multi-Facility Data Template tab, and users uploading the legacy template should see the Legacy Unified Multi-Facility Data Template tab.
The Data Upload feature only accepts templates reporting data for multiple facilities. To upload a data template for a single facility, see the Upload Data File option on the New Entry page of the Portal.
- Unified Multi-Facility Data Template
- Legacy Unified Multi-Facility Data Template
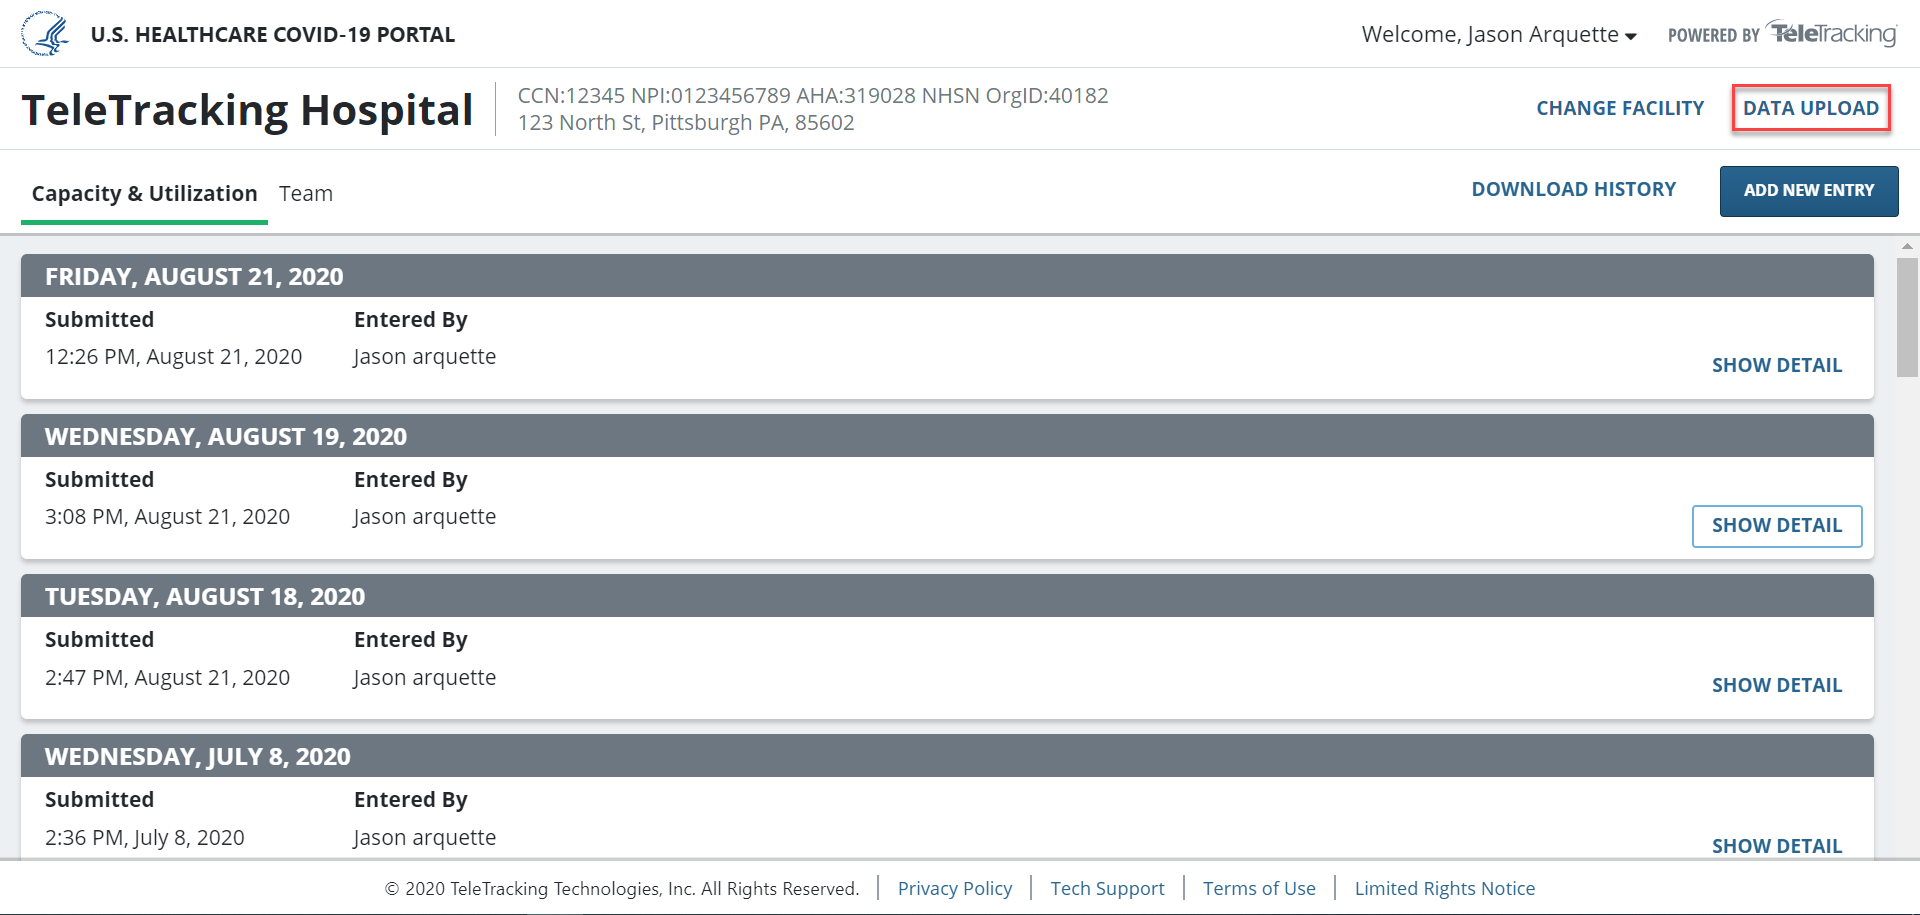
- Click Data Upload.
- Download the data template from the Data Upload dialog. This template will automatically be pre-populated with every facility you have access to in the Portal.
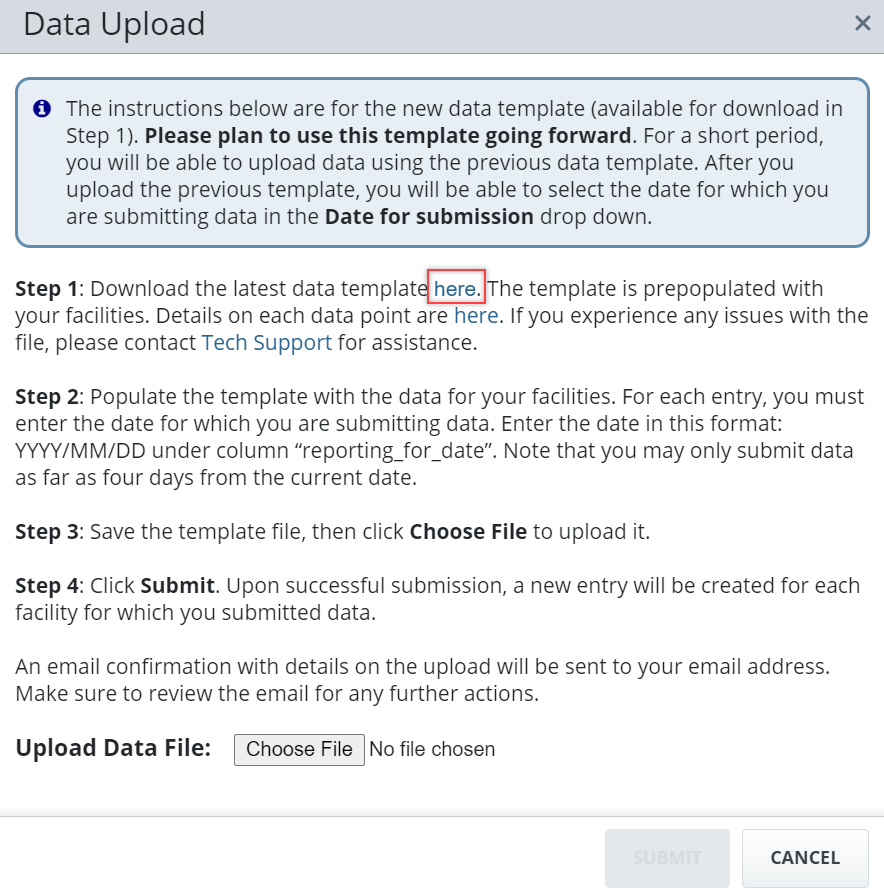
- Enter data for each facility into the template and save the file on your computer.
To specify the date you are reporting data for, enter a date in the reporting_for_date column in the data template. The Portal accepts the following date formats and can also accept data as far back as seven days (not including today):
- MM/DD/YYYY: 10/12/2020
- MM-DD-YYYY: 10-12-2020
- YYYY-MM-DD: 2020-10-12
- YYYY/MM/DD: 2020/10/12
- Click Choose File and upload the data file.
- Click Submit.
Once the template has been submitted, you'll receive an email that tells you whether or not the submission was successful. If the submission was not successful, you'll receive information on what data fields or facilities caused the error.
Once the submission is successful, each facility in your health system will receive a new data entry which can be viewed from the Capacity and Utilization tab.
The short video below demonstrates selecting Submit, the successful upload message, and then your system notification that you have received the upload results email.
- Click Data Upload.
- Download the data template from the Data Upload dialog. This template will automatically be pre-populated with every facility you have access to in the Portal.
- Enter data for each facility into the template and save the file on your computer.
- Click Choose File from the Data Upload dialog and select the data file from your computer.
- Open the Date for Submission dropdown to select which date you are uploading data for.
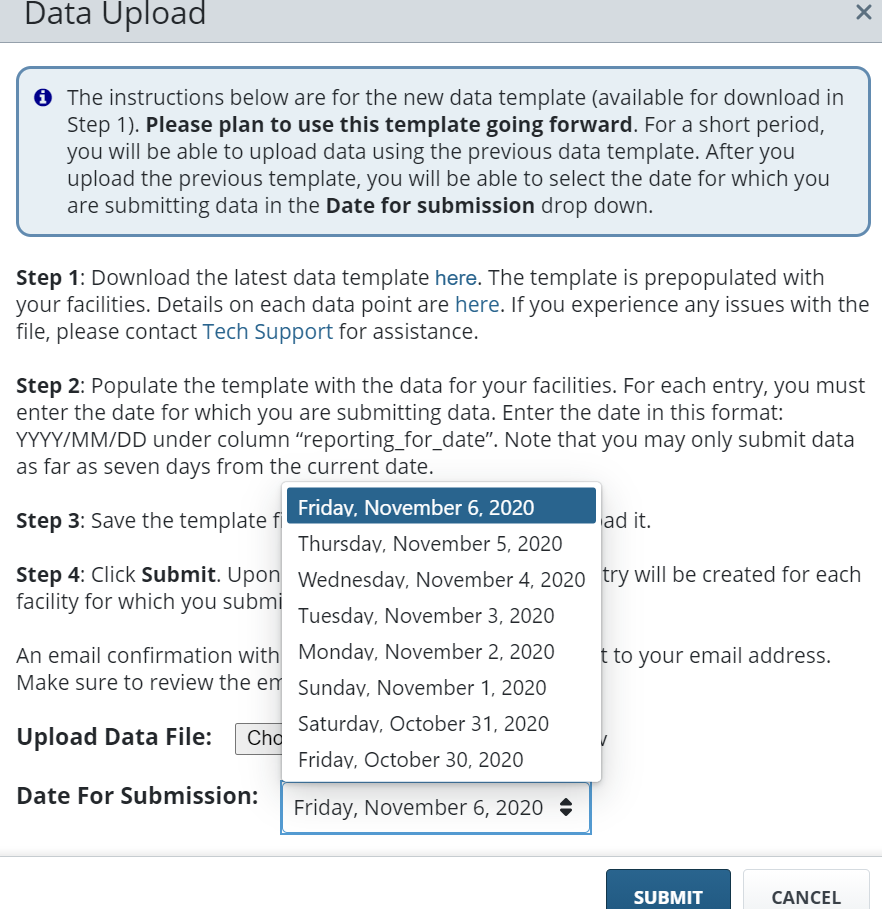
- Click Submit.
Once the template has been submitted, you'll receive an email that tells you whether or not the submission was successful. If the submission was not successful, you'll receive information on what data fields or facilities caused the error.
Once the submission is successful, each facility in your health system will receive a new data entry which can be viewed from the Capacity and Utilization tab.
The short video below demonstrates selecting Submit, the successful upload message, and then your system notification that you have received the upload results email.